Sunday, April 11, 2010

Easy Creamy Tuna and Mushroom Pasta

by Justine C. Tajonera

Easy Creamy Tuna and Mushroom Pasta

What you'll need:

  • Half a pack of spaghetti (I used whole wheat pasta. We used a whole pack but discovered that we only needed half so we set aside the other half for another pasta day).
  • a little canola oil and salt (for the pasta)
  • 1/4 clove of garlic, chopped
  • 1/2 white onion, chopped
  • 1 can button mushroom or shitake mushroom (I used shitake mushrooms), sliced into 1/4 pieces
  • 250 ml cream
  • 1/2 cup grated cheese
  • 1 can of tuna in water (drained), spread out if in chunks
  • a pinch or two of dried basil
  • Salt and pepper (to taste)

Procedure:

1. Cook the pasta in boiling water (with a little canola oil, a little salt) until al dente. Set aside.

2. Saute the garlic and the onions. Wait until onions are a little transparent.

3. Add in the mushrooms.

4. Pour the cream and let simmer slightly. Keep stirring so that cream doesn't burn.

5. Fold in 1/4 cup grated cheese. Set aside the rest for topping.

6. Once the cheese has melted, add in the tuna. Make sure it's not in chunks, anymore. Spread out.

7. Add the pinch or two of dried basil. Add salt and pepper to taste.

8. You can opt to cook in the pasta together with the sauce (which is what I did). Or you can just serve the sauce separately.

9. Optional: Serve with buttered garlic toast. We used whole wheat bread.

Serves 3-4 people.


Pasta Loving Badger

This was the only dish, so far, that my son absolutely loved. I could tell that he loved it because he kept eating without letting up and he kept asking for more servings even when he hadn't finished the serving on his plate. Of course, he ate one mushroom and decided it wasn't for him (so more mushrooms for mommy and daddy). But overall, he finished two helpings and a half.

Badger really loves pasta to begin with. However, because this time I cooked the dish, I felt really happy and content to see him shoveling the pasta into his mouth. There's an undeniable sense of satisfaction when a cook sees her loved ones genuinely appreciating the food (by eating it without pause).

I'm excited to make my next pasta dish (since the other half of the spaghetti is still in the fridge)!

Thursday, April 8, 2010

Easy French Toast

by Justine C. Tajonera

Easy French Toast

What you'll need:

  • 1 egg
  • 1/3 cup milk (I used the low-fat variety)
  • 1/3 tsp salt (or less)
  • 1/3 tsp sugar
  • 4 pieces of bread (I used the whole wheat variety)
  • a little butter
Procedure:
  • Pre-heat the pan and spread a little butter over it.
  • Beat the eggs and add the milk, the salt (I used a little under 1/3 tsp) and the sugar. Mix.
  • Pour the mixture on a flattish pan so that when you dip the bread, it can thoroughly soak up the egg mixture.
  • Dip the bread into the pan with the egg mixture.
  • Fry the bread over the pan until both sides are golden brown.
  • Serve with butter and honey or maple syrup. I also fried some lean bacon to go with our French toast.
Butter and Brunch Love

I love butter. I know it's bad for me because of all the fat. But I just love it. I love the smell of it, especially when it's cooking. So, when I was making the French toast, I was in butter and milk heaven. I over-soaked some of the pieces of bread and ended up with a not-so-soaked last bread piece. But overall our French toast was yummy and the bacon went well with it.

I love morning treats like these. Pancakes, French toast... one of these days I might make some toaster oven scones (if there's even such a thing). I think I'm a brunch type of person. That's why I love breakfast places like Pancake House, Heaven & Eggs and Flap Jacks. I associate it with family time and lots of happy conversation around the table.

Here's to more of them (butter and brunch)... in moderation. :-)

Wednesday, April 7, 2010

5 Egg Omelet with Ham and Cheese

By Justine C. Tajonera

5 Egg Omelet with Ham and Cheese

What you'll need:

  • 5 eggs
  • 2-3 slices of cooked ham
  • 1/4 cup of diced cheddar cheese
  • a dash of salt (since the ham and cheddar cheese can be salty)
  • a little butter
Procedure:
  • Pre-heat your skillet on medium-high heat. Put a little butter, enough to cover the surface of the pan.
  • Slice the cooked ham into little squares and prepare the diced cheddar cheese.
  • Beat the eggs in a bowl and add a dash of salt.
  • When the skillet is hot enough, pour the egg mixture onto the pan and leave alone for a few seconds.
  • When the sides of the omelet start getting cooked, carefully drop the pieces of ham onto the omelet until you've strategically covered most of it.
  • Then add the cheese after.
  • Carefully fold the omelet. Turn off the heat and remove from pan.
  • Serve with whole wheat toast.
Serves 2-3 people.

It's All About the Pan

I never realized how uninspired I was because I had the wrong frying pan. We were making do with an old, cheap frying pan (the thin type that burns most of the food that you put on it while the heat is high). Everything stuck to that pan and I dreaded washing it.

Why did I have to suffer?

Vier and I recently decided to get a proper pan because we had to cook (no household help). We got ourselves a Sunnex skillet on sale: double coated Teflon, thick stainless steel base, built for electric ovens (which is the one we have at home, no gasul allowed in our building). It's in an apple green color.

Boy, I'm happy. It's the first time I've been able to make lovely, perfect pancakes. And now, a lovely folded omelet. When it folded over perfectly I wanted to melt with joy. So, apparently, that's part of the secret of cooking. If you don't have the right instruments, you might not also get the results you were looking for.

Sunday, March 21, 2010

Cream Dory Baked in Foil


by Justine C. Tajonera

Recipe taken entirely from my Dad, Augusto Ch. Camacho

Cream Dory Baked in Foil

What you'll need:
  • 2 fillets of cream dory (likely 1/2 kilo)
  • a clove of garlic
  • a bulb of white onion (chopped, but not finely)
  • tomato (sliced)
  • 5 calamansi (Philippine lemon)
  • sliced ginger
  • dried parsley
  • dried basil
  • rock salt (to taste)
  • foil (enough to wrap the entire fish and the other ingredients)
  • butter
  • olive oil
Procedure
  1. Wash the fish thoroughly with water. After draining the water, rub down the fish with calamansi.
  2. Lay the fish on the foil and spread some butter over the fish. Afterward, put a little olive oil.
  3. Season the fish with rock salt (to taste).
  4. Cover the fish with parsley and basil (not too much, just enough to season the fish).
  5. Spread the pieces of garlic, onion, ginger and tomato over the fish evenly.
  6. Put in the oven (or toaster oven) and put on the high setting. Leave in the oven for 30 minutes. You can occasionally test whether the fish is cooked with a tooth pick (if the flesh comes with the tooth pick, it's still not cooked).
Preparation time takes around 15 minutes. All in all, you will have the baked fish in 45 minutes.

Sundays with Dad

This was the first meal my Dad cooked for us after retiring so it was a treat! He told us that we wouldn't be eating out anymore because he had to watch his expenses now that he's retired. And we totally didn't mind. It would give us an excuse to still meet up at his house and it would give him the excuse to indulge in one of his passions: cooking.

My Dad loves to cook. He's the kind of cook who experiments. Sometimes, it doesn't turn out well but more often than not, his cooking is really, really good. I think it's because he really puts his heart in it. And that's what matters when you're cooking.

I have a sister and a brother who cooks. And I think they take inspiration from my Dad. I was resisting it for the longest time, telling other people that my family has enough cooks. But that's not really true. There's always room for another cook in the family. As long as there are hungry stomachs and love to go around, there's always room to cook.

So, to all those who say that cooking isn't for them. Think about it. Imagine that you're cooking for someone (or a lot of someones) you love. You don't have to be an expert. You just need an open mind and heart.

Image of a fish in foil from http://www.flickr.com/photos/hirefrank/15404211/in/photostream/

Monday, March 1, 2010

Experimental Oatmeal Pancakes


by Justine C. Tajonera

I don't write the word "experimental" for nothing. The story later.

The original South Beach Recipe of Oatmeal Pancakes (with my modifications in blue)

What you'll need:
  • 1/2 cup old-fashioned oatmeal --> I used 1 cup
  • 1/4 cup low-fat cottage cheese (or tofu) --> I used 1/2 cup
  • 4 egg whites --> I used three whole egs
  • 1 teaspoon vanilla extract --> two teaspoons
  • 1/4 teaspoon cinnamon --> 1/2 teaspoon
  • 1/4 teaspoon nutmeg --> 1/2 teaspoon

Procedure:

Process the oatmeal, cottage cheese, egg whites, vanilla extract, cinnamon and nutmeg in a blender until smooth. --> I don't have a blender so I attempted to whisk everything by hand.

Spray a non-stick skillet with cooking spray. Add the batter and cook over medium heat until both sides are lightly browned. --> the batter totally fell apart upon frying so I added 1/4 cup flour to keep it at least looking like some kind of cake.

You can top the pancake with a low-sugar syrup of your choice.

Serves 1. --> Serves 2-3

Dealing with Disaster

I really saw myself successfully cooking this dish. No blender? Hmmm, I'll just use a whisk. However, that's the operative part of the procedure, apparently. A blender sort of makes the whole thing really mushed up and stiff so it doesn't fall apart in the pan.

As you can guess, my first "pancake" fell apart in the pan. The first thing I thought of was: I need flour! If anything, flour makes something formless have some kind of form. What I did notice was that I kept my cool. I wanted it to work, somehow.

The result was a kind of oatmeal cake crisp for the ones we fried and for the ones I put in the toaster, a kind of oatmeal pudding. Of course, it wasn't the best thing I ever tasted. But, it wasn't something I would throw out in the trash. :-)

According to Vier, the only thing he just didn't like about the fried version was it used up too much oil.

So there. No tears. It happens. And what you can do with oatmeal-pancake-disaster-in-the-making is to turn it into oatmeal pancakes that you can eat. What helped was seeing it all as an adventure. Nothing was going wrong, it was just a matter of taking a different turn.

(March 2, 2010)
Image from http://www.flickr.com/photos/nyxie/325008652/

Sunday, February 21, 2010

Easy Fish Fillet in Wine Sauce and Creamy Asparagus & Corn


By Justine C. Tajonera

I got this recipe from the South Beach Diet book. It was extremely easy to follow and it's healthy as well. I just substituted the chicken fillet with fish fillet.

What you'll need:
  • 4 tablespoons extra virgin oil
  • 1 clove garlic, crushed (but in my case, I chopped it)
  • 1/2 kilo cream dory (or two sides of fish), cut into strips
  • 1/8 teaspoon salt
  • 1/4 teaspoon coarsely ground black pepper
  • 1/2 cup dry white wine (in my case, I used the small bottle of wine that we got as a gift: Fortant Sauvignon Blanc)
  • 3 medium tomatoes, sliced
Procedure:
  1. In a medium skillet, heat the oil and the garlic over medium heat.
  2. Sprinkle the fish with salt and pepper, then add to the skillet and cook for 7-10 minutes (in my case, 10 minutes).
  3. Add the white wine and cook for an additional two minutes.
  4. Remove the fish to a platter.
  5. Saute the tomatoes until tender.
  6. Place the tomatoes over the kitchen and cover with pan drippings.
Serves 3-4.

Side Dish: Creamy Corn and Asparagus (half invented and half lifted from Naty, my Dad's housekeeper)

What you'll need:
  • 1 can corn kernels (you can also try creamed corn but for the dish I cooked last Saturday, I used whole corn kernels)
  • 4-5 stalks of asparagus, cut into 2-3 pieces per stalk
  • 1/2 onion bulb or less, chopped
  • 1/3 clove of garlic, chopped
  • 1/4 cup cream
  • salt and pepper to taste
Procedure:
  • Saute the garlic and onion.
  • Add the asparagus stalks. Cook until asparagus stalk is no longer tough.
  • Add the corn.
  • Season with some salt and pepper.
  • Add the cream.
  • Keep stirring for another 2-3 minutes. Then serve.

Sacred Sunday

I cooked this dish last Sunday, after swimming with Badger in the condo pool. Just that Friday Badger had been sick (read my poem about it here). But by Sunday, he was excited and full of his usual exuberant spirit. I remember just keeping my beach caftan on, not even bothering to shower or comb my hair because I was excited to cook. Of course, the dish was too sophisticated for Badger who usually opts for tuna hotdog and rice. But it was wonderful to be home, cooking something that smelled good and was easy to make too. With the smell of simmering garlic, olive oil and wine, Badger played with his blocks before settling down for a meal with his mommy and daddy. I wonder if he will remember, one of these days.

Sunday, February 14, 2010

Valentine's Day Recipes: Calamansi Baked Fish & Toblerone Chocolate Fondue

by Justine C. Tajonera

We stayed in for Valentine's Day. But I cooked two things: a healthy (I think) fish fillet lunch at home and some (unhealthy) fondue after dinner at my Dad's place.

Calamansi Baked Bangus Fillet (adapted from the Lime Baked Fish of the South Beach Diet Book)


What you'll need:
  • 1/4 kilo bangus back fillet (or half the pack)
  • 1/4 cup calamansi (or Philippine lime) juice (from freshly squeezed calamansi)
  • 1 teaspoon dried tarragon leaves
  • 1/4 cup chopped green onion tops
Procedure:
  1. Arrange the fish fillet in a baking dish (on my end, I lined my toaster pan with some wax paper and then put the fish fillet in it)
  2. Sprinkle with the lime juice, tarragon and onion tops (on my end, I added salt and pepper to taste)
  3. Bake covered at 325 degrees F for 15-20 min or until the fish flakes easily (on my end, I left it uncovered but put some butter on the tops of the fish and toasted in the toaster oven for 20 minutes)
The Verdict: A bit sour and a bit peppery but overall, pretty good and healthy.

We ate the fish at home and paired with some sauteed crunchy Baguio beans and some corn (scraped off the cob) that we microwaved with a bit of butter. I enjoyed making this as it was really easy to do and I knew it was healthy (well, except for the dabs of butter!). It also didn't take too long to make.

For Valentine's Dinner Dessert: Toblerone Chocolate Fondue with Banana


Image from http://www.flickr.com/photos/asbjorn_floden/2402328243/

What you'll need:
  • 1/2 cup cream (on my end, I used Nestle cream in a tetra pak box)
  • 2 bars of Toblerone chocolate (we bought the V-Day gift variety which consisted of one milk chocolate bar and one white chocolate bar)
  • 1 tbsp of brandy (better if Cointreau or Kirsch Brandy... on my end, I made the mistake of putting in 1/4 cup of Carlos Primero Brandy and ended up adding the second bar of chocolate to make up for all that brandy!)
  • 1 piling of Lacatan banana (sliced horizontally, just keep adding until the sauce is finished)
Procedure:
  1. Put all the ingredients in one microwaveable pot.
  2. Nuke in the microwave (I got the term "nuke" from my sister. I love it!) for less than a minute and stir with a wooden spoon or a spatula and keep nuking and stirring until it's a well-blended chocolate-y and gooey mass of fondue dip.
  3. Dip in the sliced bananas and enjoy.
The Verdict: Nakakalasing (gets you drunk)! But after adding the extra bar of Toblerone chocolate, we just kept going.

This was really, really easy (except for my mistake with the brandy!). It's great for any kind of cook (although, some would want to cook this in a proper sauce pan on low heat). I enjoyed the simplicity and the yummy goodness of this fondue and I expect to have more of it in the future. Maybe, I can mix in dark chocolate later on. Also, when I do find some Cointreau or Kirsch Brandy, I'll see how this recipe goes.

Sunday, February 7, 2010

My First Stew: Good Wishes Gumbo du Monde


by Justine C. Tajonera

I followed Chuck Taggart's Gumbo du Monde recipe but made some changes based on what I could find in the grocery and what kind of pot I was using.

He couldn't emphasize the stock making process enough so I did follow his advice and spent the whole day cooking!

The Stock (very important):
  • I didn't have a big cast iron sauce pan so I didn't exactly follow the number of quarts required in Chuck's version. Since I was using my rice cooker-cum-pot, instead of 8 quarts of cold water I used only 9 cups (250ml) or 2.5 quarts.
  • Around nine pieces of chicken parts from a Magnolia soup pack
  • 1/2 kilo of shrimps (with heads and shells)
  • 2 onions, chopped
  • 1 big stem of celery, chopped
  • 2 carrots, chopped
  • 2 heads of garlic, chopped
  • Sachet of spices (I emptied a tea bag and stuffed it with the following spices):
  • 1 teaspoon of cracked black peppercorn
  • 1 bay leaf
  • 1-2 parsley sprigs
  • 1/2 teaspoon dried thyme leaves
  • 1/2 teaspoon dried tarragon leaves
  • 1/2 teaspoon dried oregano leaves
  • 1/2 teaspoon dried basil leaves

Procedure:
Make sure the chicken is in 3-4 inch pieces, exposing the bone. Brown the chicken parts in a skillet with oil.

Put the chicken in the stockpot with the water and bring slowly to a simmer. Periodically skim off any scum that forms. Let this simmer for 3-4 hours. In my case, I really let it simmer for four hours. It's the long simmering process that extracts maximum flavor from the chicken meat and bones.

Add the onion, garlic, carrots and celery. Place the peppercorns, parsley sprigs and dried herbs in a tea ball (in my case, an emptied tea sachet). Tie it up. To make it easy to retrieve, tie the end of one string to the pot handle so it's easy to retrieve. Simmer for one more hour. Then add the shrimp shells and heads. Simmer for an additional 30 minutes. Remember not to stir the stock while simmering.

Strain thoroughly. Ladle the stock out and pour through a strainer. A tip from Chuck: If you did this ahead and want to keep the stock for the gumbo to be done the next day, you can cool down the stock by freezing some water in a Ziploc bag and putting it in the stock (that way, you cool it down without putting it in the refrigerator right away) and you don't dilute the stock.

Make some Roux!

What you'll need:
  • 1- 1/4 cups flour. I used 1/3 only because I had such a small pot
  • 1 cup oil. I used only 1/4 cup (1/8 butter and 1/8 oil)

Procedure:

Blend thoroughly on a skillet. Be careful not to burn it. If you see black specks on the roux that means you've messed it up. You have to throw out that batch and start again.

I got so scared of this warning that I cooked the roux on low heat (as in, the lowest heat) and ended up stirring the roux for an hour! Just keep stirring and don't let it clump up, otherwise it gets ruined. If you don't have enough time, then cook in medium heat but wait only until the color is peanut-buttery. Don't get any splatter on you. Because I cooked mine on low heat, I didn't get any splatter.

This roux will be mixed in with the strained stock. You can make this ahead and refrigerate or freeze. Thaw and heat up when you're ready to mix with the stock.

For the Rest:

  • Chicken, cut up (since I was budgeting, I used the same chicken in the stock. I could not see myself throwing out that chicken!)
  • 1 Schublig sausage. Ideally, you should use andouille sausage or any smoked or creole sausage. The schublig was the only one I could find in Shopwise that was smoked. Badger ended up eating only this part of the gumbo.
  • 1/2 kilo shrimp (de-veined and peeled)
  • You can have crabs but I skipped the crabs
  • Okra. I used 10 pods of okra (cut up diagonally)
  • 1 onion (chopped)
  • 1 bunch green onions (chopped) but I wasn't able to buy any so I skipped this.
  • 2 bell peppers
  • celery, chopped (I used one really long stem)
  • garlic, minced (I used half a clove)
  • 3 bay leaves
  • 1 bunch fresh parsley (chopped)
  • Creole seasoning (in my case I used some ground nutmeg, cayenne pepper, black pepper)
  • Salt to taste
  • Tabasco to taste
  • Rice

Procedure
Sprinkle the chicken with some spice and brown (I had to fry because I don't have an oven). Slice the sausage and brown as well.

Saute the onions, green onions, garlic, bell pepper and celery. Add to the stock (with the roux). Add the chicken and the sausages. Add the bay leaves and more spice (to taste) and stir. Bring to a boil and immediately reduce to a simmer. Simmer for 45 minutes. Keep tasting and adjusting the seasoning as needed.

Add the okra and cook another 30 minutes. Make sure the "ropiness" or "stringiness" of the okra is gone. Add the parsley. Cook for another 15 minutes. Add the shrimp last. Give it another 6-8 minutes until the shrimp is cooked. Be careful not to overcook the shrimp. Skim the fat off the top of the gumbo.

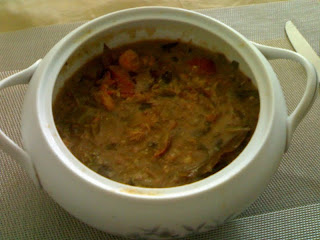
Serve the gumbo over steaming rice.

The Story Behind this Recipe:

Badger and I watched The Princess and the Frog the other weekend. There were two instances in the movie that gumbo was cooked. I got so hungry watching all that gumbo being cooked so that right after the movie, Badger and I ended up in Gumbo (the Atrium, Megamall). I got so enthralled with the gumbo that I decided to try cooking it. Quite ambitious for a first time cook, right? I was thinking that my love for the dish would carry me through. Also, it's a really messy looking dish so I wouldn't fail on presentation. Hahahaha!

When I looked up Chuck Taggart's recipe I was challenged by the fact that it takes the whole day. I've never really cooked before, much less the whole day. So I told myself that it would be worth something if I cooked a dish the whole day.

Stretching the Groceries
Just buying the ingredients was a challenge. My husband told me, "Honey, next time you have a craving for gumbo, just buy some." Our grocery bill was high (I think that was due to the numerous spices that weren't available in small sachets). After cooking the gumbo, though, I realized that even a 2.5 quarts recipe was still too large for our small family so it would last us for another day, saving us more ingredients. I think we might be able to stretch our groceries for another week. :-) Also, try to re-use as much of the ingredients from the stock. I felt really bad about throwing some of the ingredients out together with the shrimp shells.

Cooking Prayers
Cooking the gumbo was kind of like a prayer for me. In meditation class, I remember my teacher telling me that cooking is a big deal because the cook imparts her psyche into the food: the more good wishes, the better the overall sustenance of the dish. So, I took the opportunity to put all my good wishes into the stock, into the roux, into the whole gumbo dish. It's actually, literally a Good Wishes Gumbo! Because it takes so long, there are moments when you get lost in the smell of the stock and your thoughts get drowned out with the aroma from stirring such a potent stew.

The results: my husband's praise and lots of time spent with my son. In between checking the pot, cutting things up and stirring, I spent a lot of time with Badger! And when Vier got home he couldn't help but comment on how good our condo unit smelled. Badger didn't like the gumbo because of the okra so he ended up eating a lot of the sausage in the gumbo (I'm glad I put cut-up pieces of a whole sausage in it!). But Vier and I had a feast. It's not exactly the same as the gumbo from the restaurant but I was proud of my first efforts. Because of my mindfulness, I didn't burn anything. Because of the love that I was constantly stirring in my mind, we had a fabulous and filling dinner together.

Tuesday, February 2, 2010

Flipping Sunday Pancakes


by Justine C. Tajonera

My first attempt at cooking, since the start of this blog, was Sunday Pancakes. My sister asked me if I made it from scratch (which would have been a feat worth bragging about) but, no. I told her, "I made the pancakes from a box" to which she responded, encouragingly, "Hey, that's still something!"

I won't put up the recipe here because... it's on the box of pancakes.

But here are some things I learned:

  1. My husband suggested that we add an egg to the mix (even if the directions did not include it). It came out pretty well.
  2. When they start the directions with "preheat the pan," you should really preheat the pan. Hahaha! Typically stubborn, I told myself that since this was my first time I should just concentrate on mixing the batter. But what I didn't expect was the amount of time it takes to get the pan heated in the first place. Unless the pan is hot and ready, your batter will just lie there and amass some oil. So, to be efficient with your time, trust the directions.
  3. I love flipping pancakes!!! I get really excited to turn over a pancake and see that I didn't ruin it. I think this is exactly how I will feel about flipping an omelet.
  4. After cooking, I made sure to soak my cooking utensils and pan in water so I wouldn't have trouble scraping off the dried up batter later on.
  5. We used a box of pancakes that came with syrup. According to my husband we save money this way because we only buy enough syrup for the one serving and we don't need to store syrup in the fridge.

Next time, I'll see what I can do about making pancakes from scratch (or maybe modifying the pancakes and adding more exciting stuff to it).

I just love pancakes. I associate pancakes with "the good things in life." I don't know when I started doing that. I mean, it's just fried batter, right? Whenever I eat pancakes I feel like it's a special occasion. I guess my enthusiasm over pancakes rubbed off on my son because he really loves it too. What was so great about making my own pancakes was the idea that I could rely on myself and trust myself to create something that I love to eat without waiting for anyone to do it for me. Also, it was really thrilling for me to actually prepare it and serve it to my husband and son, with love.

That's how I saw my pancakes: not the best pancakes in the world... but special pancakes, nevertheless, because they were full of my love for my family.

Calling on people who have pancakes recipes they want to share!

(Feb. 3, 2010)
Image from http://www.flickr.com/photos/31899105@N05/3683698682/

Monday, February 1, 2010

Spaghetti Carbonara: A Recipe of Comfort and Love from my Dad


By Mercedes Camacho Peterson

I learned how to make Spaghetti Carbonara fr0m my Dad. I was probably in 5th grade when I learned the recipe. Daddy always enthralled us with his story of learning this recipe of "authentic" carbonara from his Italian friend from Cebu. And so I learned it by watching, and learned it by heart.

Growing up, we moved houses a lot. From our beautiful, sprawling bungalow in Maria Luisa in Cebu where we spent the majority of our childhood we left for Manila and then the endless pilgrimage from house to house started. We must have lived in at least 6 houses in Loyola Heights, a condo in Magallanes Village and at one point lived in Paranaque. During these upheavals, making carbonara was a way to settle down in each home. We'd gather around the table and partake of the best comfort food--carbonara. I would normally make it for Sunday lunch.

And the tradition still continues--I never fail to make carbonara during special occasions especially when family and friends are around. I make it from memory because I've made it so many times and is one of the few "savory" dishes I make because my forte are desserts.

Here is the wonderful recipe from my Dad.

What you'll need:
  • 1 pack spaghetti (use any brand you like and cook according to directions, al dente)
  • 1 pack of Purefoods bacon ( medium pack, the round tightly packed one, add more if you want more bacon-ey goodness) cut into small pieces. I use kitchen scissors to make the job easier.
  • 2 heads of garlic, crushed and then chopped finely. (Don't forget to remove the garlic peel!)
  • 1 small carton all purpose cream (Nestle works)
  • 1 small bar of Quickmelt cheese, cut into tiny cubes
  • 4 to 5 eggs, beaten slightly
  • 1/4 stick or around 4 tbsps. butter (salted)

Method:
  1. Melt the butter over medium heat in a big wok (this works really well with big batches of carbonara) or any huge Teflon pan--I use the Teflon pasta pot where I cooked the pasta so I have less pots to wash.
  2. Brown the garlic until lightly golden, then add the bacon and "render" (meaning let the fats sizzle out and brown it a bit) when it is slightly brown, drain some of the fat so that the pasta doesn't become too oily.
  3. Add the pasta and toss with the bacon and garlic, and at this point you can add the cream and the cheese as well. Toss everything under low heat until cheese melts and all ingredients are mixed well. Be gentle!
  4. Turn heat off and add the slightly beaten eggs, mixing quickly (or else your eggs will become scrambled eggs if you're not quick enough!) until homogeneously mixed.

Serving suggestion Side Dish:

Garlic Bread With Parsley Butter

What you'll need:
  • 1/2 stick salted butter
  • 2 tbsps. of chopped curly parsley
  • 1/2 head of garlic, peeled and chopped very finely
  • 1/2 loaf of baguette or pan de sal or whatever bread you have on hand

Method:
  1. Soften butter by nuking in the microwave ("defrost" for 12 secs).
  2. Mix in the garlic and parsley with a rubber scraper (spatula).
  3. Spread on your bread with a spatula or knife.
  4. Toast in your toaster for 7 minutes or in your moderately heated 150 c oven for 12 minutes.
Best enjoyed with family and friends and huge litro of Coke zero :-)

Friday, January 29, 2010

The Start of an Adventure


By Justine C. Tajonera

I've always told people I don't know how to cook. It's been my story for ages. Oh, I've never found the time. Oh, my brother cooks, my sister bakes and... I write. I don't need to cook, really.

Stalled Start
Two years ago, some friends of mine were exploring the idea of coming up with a cook book for first time cooks. People who had just gotten married and were now faced with their own kitchens. We were excited! We said we would start with a blog. The task was assigned to me because I already had two blogs to my name. However, I never got it started. I had a lot of excuses: life got in the way, I was struggling at work, I don't have the time. Pretty much all the excuses for not really pursuing something that I said I would do.

A Life of Adventure
However, just today, something occurred to me. I want to live a life of adventure. I want my family to live a life of adventure. We committed to going to Kyoto in March. However, we're backlogged with bills and we realized that a lot of our credit card expenses were from eating out. Hmmm. It all came together.

A life of adventure is a life of going beyond my limits, my stories like "I'll never learn how to cook." A life of adventure isn't necessarily a life of luxury. It's a life of doing new things, exploring new ways of being. And the big side benefits are: saving money (including learning how to get
an exact budget around our groceries and really planning our meals) and eating healthy.

So, today I called up my friends and my sister and I shared with them that I was finally putting up this blog. A historic first day.

A Vision of Good Things
I have no recipes to share here yet. But I see a vision of abundance on this blog:
  • Friends generously sharing tried and tested recipes
  • Friends sharing the stories behind the recipes or occasions when the recipes were prepared and served (including frustrations, mistakes and struggles). A no-holds-barred account of the cooking process.
  • Friends sharing advice with first time cooks like me (who think they don't have what it takes to cook). One step at a time procedures, tips and sisterly encouragement when things don't go as planned.
Friends in the kitchen is a starting place for me. It's my way of affirming my possibility of a life of adventure. And what better place to start than in the kitchen, among friends? I raise a toast to my friends, to a delicious life, and the creation of wonderful meals for people we love.

(Jan. 30, 2010)
Image from http://www.flickr.com/photos/84834136@N00/54678798